ComfyUI is a web UI to run Stable Diffusion and similar models. It is an alternative to Automatic1111 and SDNext. One interesting thing about ComfyUI is that it shows exactly what is happening. The disadvantage is it looks much more complicated than its alternatives.
In this post, I will describe the base installation and all the optional assets I use. I will provide workflows for models you find on CivitAI and also for SDXL 0.9.
Installation
Its installation is pretty straight forward on Windows (I haven’t tested on Linux but it seems straightforward as well). Follow the instructions here.
If you use an AMD GPU, you need a couple of extra steps as described here. If you used the release file from Github, you should copy run_nvidia_gpu.bat to run_amd_gpu.bat and apply the option --directml.
You can also run it in CPU-only mode but it is extremely slow compared to using a GPU (tested on AMD Ryzen 9 5900X).
Models
To start working, you only need a model. Here are a few well-known ones:
- Stable Diffusion 1.5: runwayml/stable-diffusion-v1-5 · Hugging Face
- Stable Diffusion 2.1: stabilityai/stable-diffusion-2-1 · Hugging Face
- SDXL 0.9 base: stabilityai/stable-diffusion-xl-base-0.9 · Hugging Face
- SDXL 0.9 refiner: stabilityai/stable-diffusion-xl-refiner-0.9 · Hugging Face
Your need both models for SDXL 0.9 and the workflow is a bit more complicated.
You can also find many other models on Hugging Face or CivitAI.
Optional assets: VAE
Variational AutoEncoder is an artificial neural network architecture, it is a generative AI algorithm. It takes noise in input and it outputs an image.
All models include a VAE, but sometimes there exists an improved version. Test the same prompt with and without the extra VAE to check if it improves the quality or not.
A couple well-known VAEs are from Stability AI and help fix eyes and text:
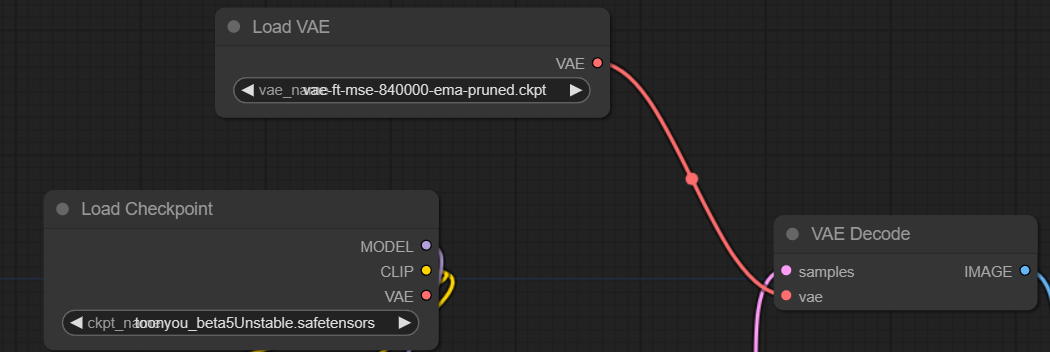
To use another VAE, you need to add a new node of type Load VAE and link it to the VAE Decode node instead of the one from the model (Load Checkpoint node).
Default VAE:

Extra VAE:
Source:
Optional assets: LoRa
Low Rank Adaptation is a technique for efficiently finetuning machine learning models.
Those assets are usually pretty small and allows you to add or change specific features of the output, such as:
- setting the hair style
- changing the art style
- changing the clothes
- add some accessories
With ComfyUI, you use a LoRa by chaining it to the model, before the CLIP and sampler nodes. You can see an example below.
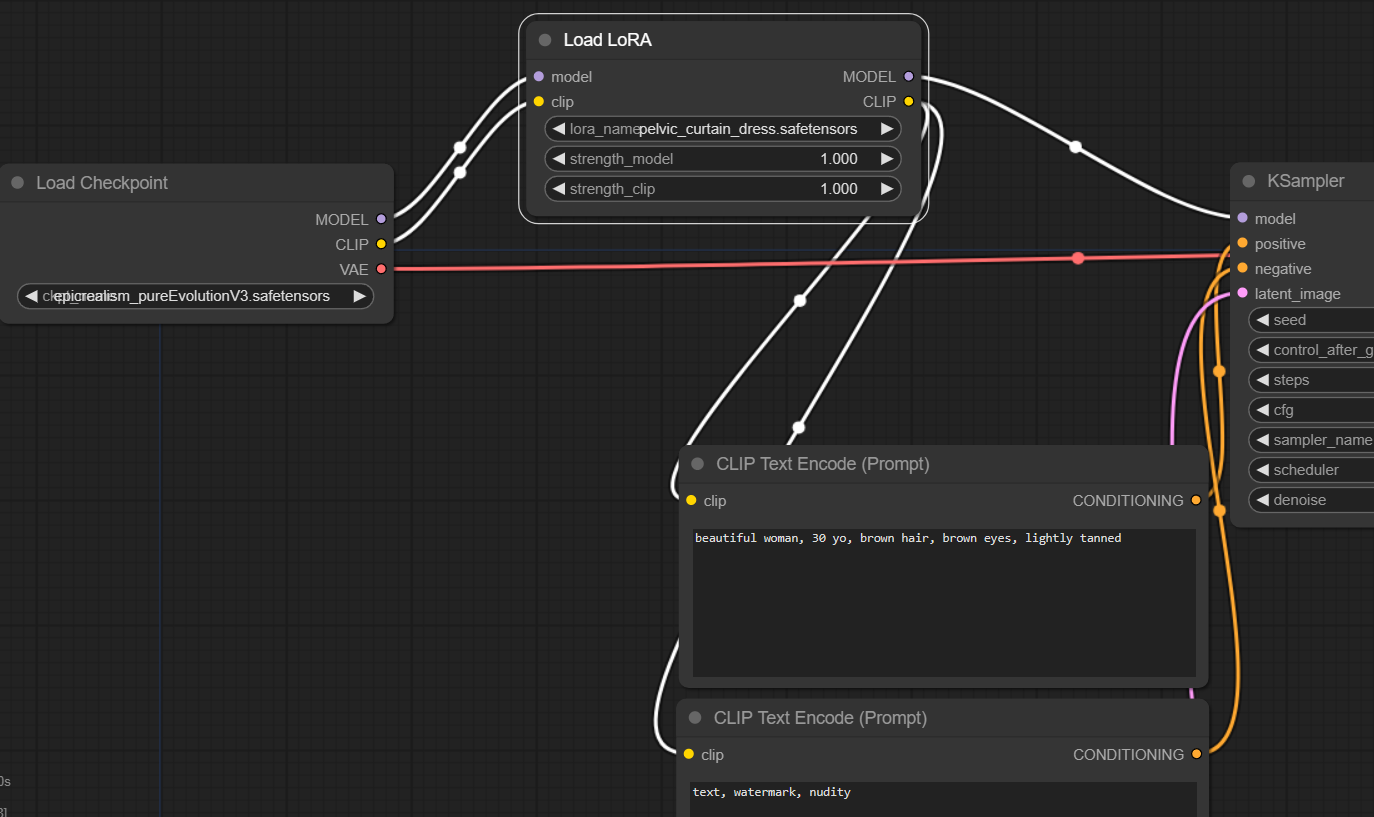
You also need to specify the keywords in the prompt or the LoRa will not be used. You can also vary the model strength. Mentioning the LoRa between <> as for Automatic1111 is not taken into account.
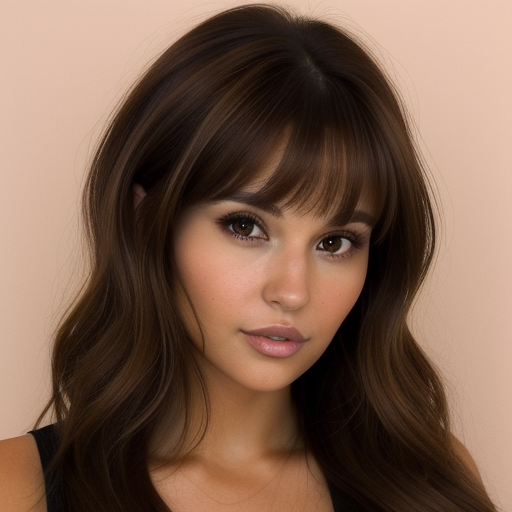
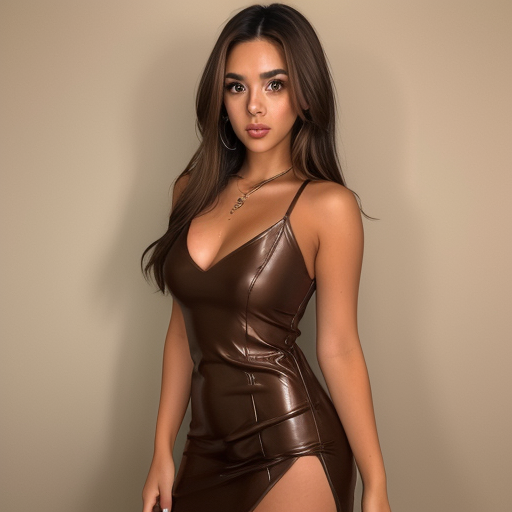
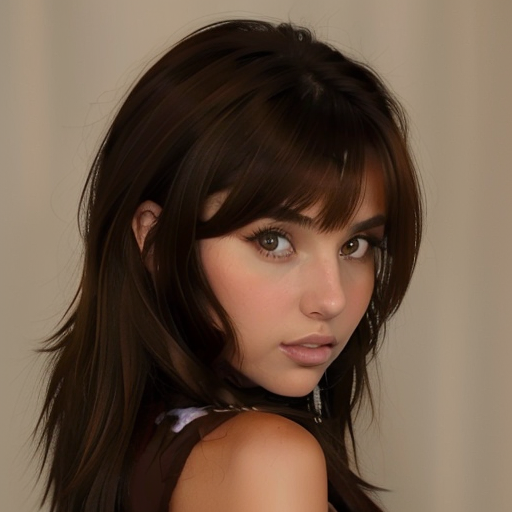
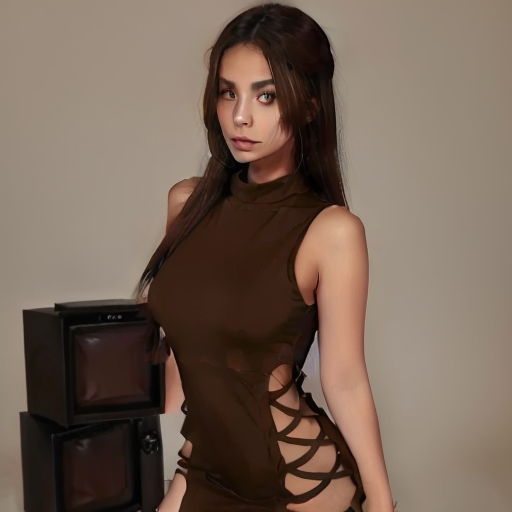
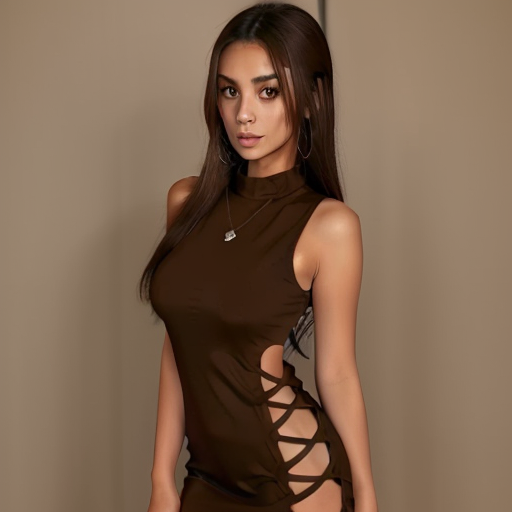
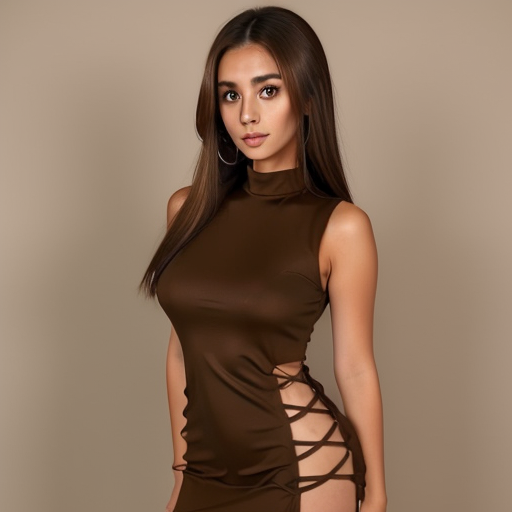
Here are a few variations of the prompt with and without a LoRa chained. The LoRa makes sure a certain style of dress is applied. The base prompt is:
beautiful woman, 30 yo, brown hair, brown eyes, lightly tanned
- without chaining, without keyword:
- without chaining, with keyword:
- with chaining, without keyword, strength 1.0:
- with chaining, with keyword, strength 1.0:
- with chaining, with keyword, strength 0.7:
- with chaining, with keyword, strength 0.4:
You can see the LoRa is not taken into account if it is not chained AND mentioned in the prompt.
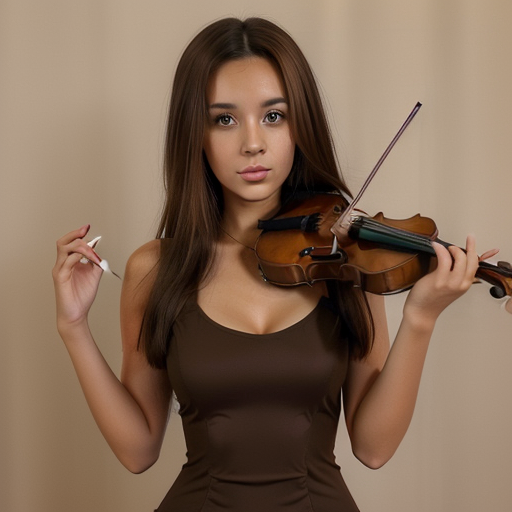
You can also chain LoRa’s. Below, I added one to include a violin.
Source: Lora Examples | ComfyUI_examples (comfyanonymous.github.io)
Optional assets: textual inversions or embeddings
Teach the base model new vocabulary about a particular concept with a couple of images reflecting that concept.
With embeddings, you can add knowledge to the model. For example, if the model does not know who is Angelina Jolie, you can use an embedding to add that knowledge in the model. It happens this is one of the most downloaded embeddings on CivitAI.
After downloading the embedding file, you use by simply mentioning it in the prompt with embedding:filename:strength.
Below, you can see a few pictures with the Clutter-Home with different strengths (from 0 to 1.2):

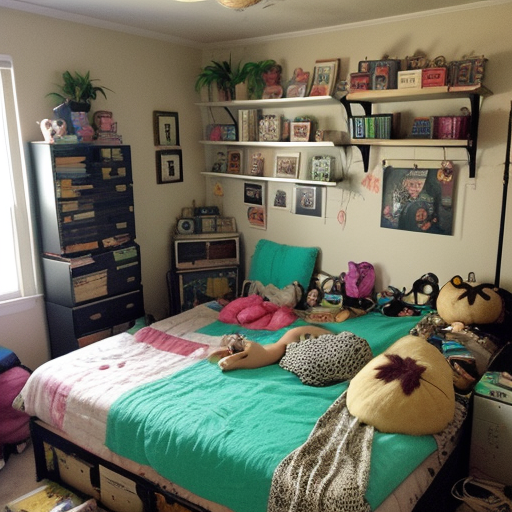
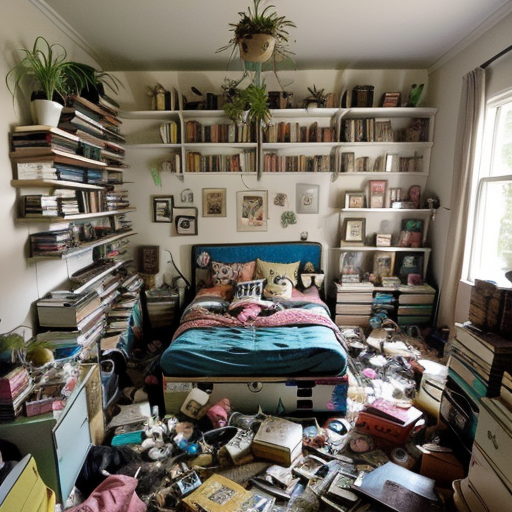
Source: Textual Inversion Embeddings Examples | ComfyUI_examples (comfyanonymous.github.io)
Optional assets: custom nodes
The developers have made it easy to develop custom nodes to implement additional features. One well-known custom node is Impact Pack which makes it easy to fix faces (amongst other things). I will make a separate post about the Impact Pack.
You can find a list of custom nodes on this repository: GitHub - WASasquatch/comfyui-plugins: Extensions, Custom Nodes, and other plugins for ComfyUI
Optional assets: upscalers
Usually, images are generated with a low resolution to lower the resources requirements and the time to generate the pictures.
To get larger pictures with a decent quality, we chain another AI model to upscale the picture. The additional nodes are pretty easy, you just chain the output image to the Upscale image (using model) node and that’s it.
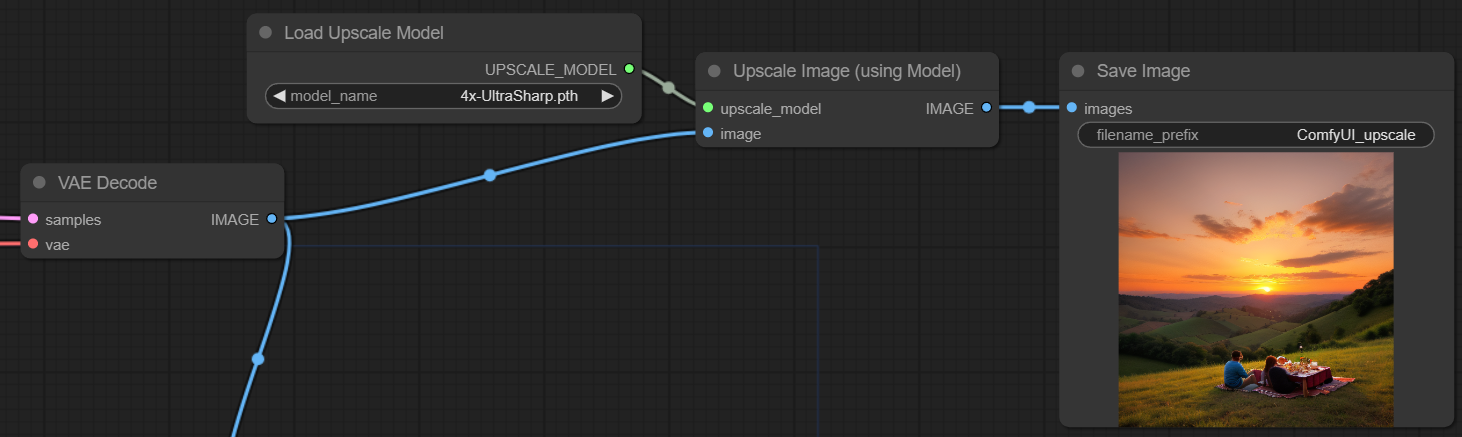
Here is the original image (512 x 512):
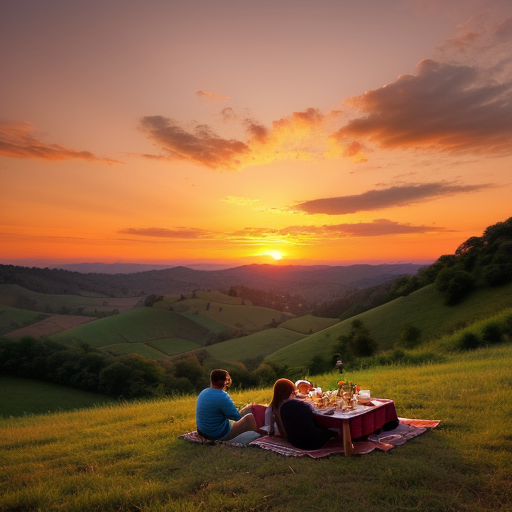
Here is the upscaled image (2048 x 2048), click for full size:
I think this covers the basic assets you might want to use. I will make other posts about specific subjects if needed.